

EDC Gunfighter vs. Force on Force: Scenario Training — Which One’s Right for You?
At The Defense Lab, we aim to share knowledge and create better protectors through in-person training. Whether you’re brand new to defensive training or already seasoned, we offer two core seminars that challenge different aspects of the fight.
Each one pushes you in a unique way — and both are built from real-world analysis and pressure-tested experience.
EDC Gunfighter
EDC Gunfighter takes you straight into the fight, where distance is gone, space is limited, and control is everything. This is close-quarters training designed around weapon retention, entangled fighting over weapons, and shooting from contact distances.
These situations start at clinch range, often end up on the ground, and escalate quickly. We’ll break down the critical skills you’ll need — from positional control to weapon access and recovery. Then, we’ll test it all in live resistance-based training at the end of the day.
This course is built around extreme close-quarters encounters, where you’re either fighting to keep your weapon holstered, fighting to draw it, or fighting to stop someone else from doing the same.
What We Cover:
Fighting to the draw and using your pistol at clinch range
Fighting from clinch and ground positions with a weapon in play
Weapon retention in the holster and during the draw in extreme close quarters, using frames, leverage, and movement to regain control under pressure
Defending, retaining, and regaining control of your weapon.
Stuffing, stripping, and countering another person’s draw and offense
Resistance-based rounds are not full-contact fights, but high-effort reps with a training partner who helps sharpen your skills through pressure
Physical contact to reinforce the realism and application of everything taught
EDC Gunfighter is built for the moments when drawing a gun is only half the battle — keeping it is the other half.
Force on Force: Scenario Training
Force on Force: Scenario Training steps back from the clinch and drops you into full-scale situational simulations using Simunition pistols and live role players. These scenarios are based on real-world violent encounters caught on video.
Before you're ever put into a scenario, we spend the first part of the day teaching and drilling the exact skills you'll need — from live-fire reps to partnered drills. When it’s time to test them, you’ll be ready.
You’ll face threats at distance, manage unknowns, and navigate complex environments that challenge your awareness and decision-making under pressure.
What You’ll Experience:
Live-fire drills to sharpen your fundamentals and prepare you for multiple different scenarios
Partnered drills focusing on movement, protecting others, managing multiple attackers, and reading intent
Scenario-based training with threats at 1–15 yards requiring real-time use-of-force decisions
In-depth simulations with 1–4 role players, varied settings, bystanders, instigators, and environmental props — including vehicles
After-action debriefs to analyze your decisions, refine your judgment, and learn from your performance
Little to no physical contact — this seminar focuses on your thinking, movement, and reactions under pressure
WHICH ONE SHOULD YOU TAKE?
Both courses serve a purpose — and together, they build a complete fighter.
EDC Gunfighter is for those who want to own the close-quarters fight when weapons are involved. It’s physical, hands-on, and focused on entangled combat, weapon retention, and surviving when space disappears.
Force on Force: Scenario Training is for those who want to develop sharp decision-making, situational awareness, and the ability to apply their skills under pressure in more dynamic environments.
If you're serious about preparing for the full spectrum of violence — from clinch range to complex public scenarios — you need both.
Start where your gaps are. Then fill the rest.

The Evolution of the Ehud: What’s New in V2.
When we first launched the Ehud, our goal was to deliver a purpose-built tool designed for real-world performance. Every inch was engineered with intention, and we’ve spent time since then listening, testing, and refining. Now, the next evolution is here.
The Ehud V2 builds on the original foundation with a series of upgrades focused on comfort, retention, durability, and performance. Here’s a breakdown of what’s new:

Upgrade #1: Comfortable Carry
We’ve refined the “flag” by rounding it off for smoother carry.
What it means: No change to your grip, but less chance of hotspots during extended wear.

Upgrade #2: Sheath Longevity
Handle texture below the retention divot has been removed.
What it means: Better sheath life and smoother, more consistent retention over time.

Upgrade #3: DLC Coating
Bolts and blade now feature a durable DLC coating.
What it means: A harder finish than the V1, that resists wear better over time.

Upgrade #4: Weight Reduction
A new cut-out under the handle scales drops the weight by roughly 0.5 oz.
What it means: Easier daily carry without sacrificing strength.

Upgrade #5: Updated Trainer
Brighter blue color and further-rounded edges.
What it means: Better identification and safer contact in training environments.

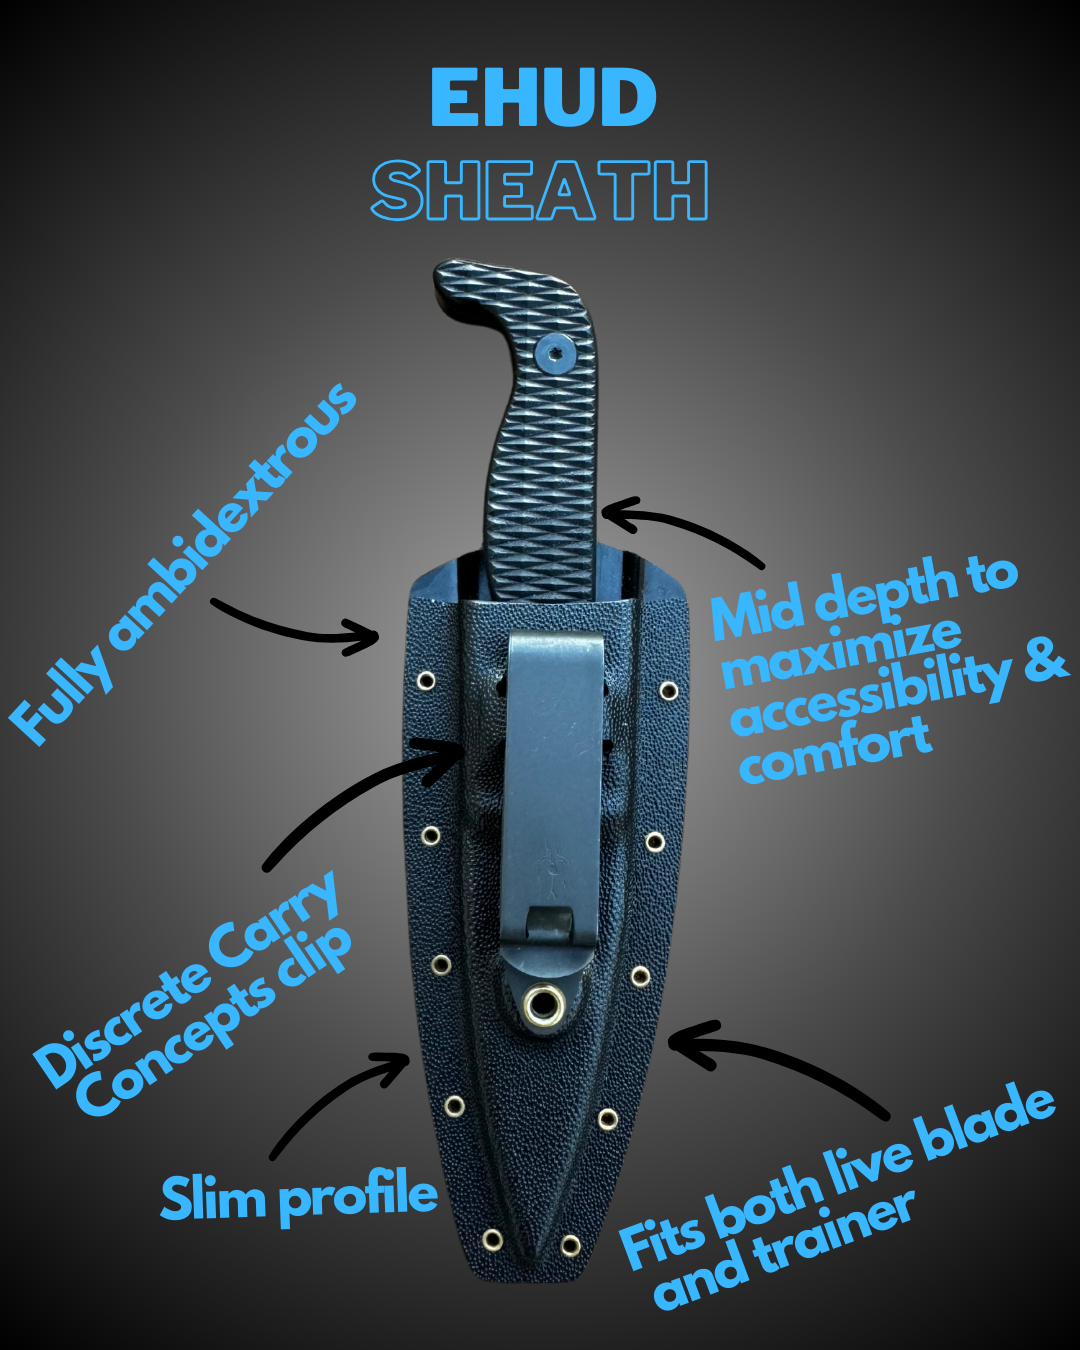
Upgrade #6: Updated Sheath
Now 3D printed.
What it means: Slimmer fit, better, more consistent retention over time, and backward compatibility with the Ehud v1.

Ehud Blade: Set Up + Getting Started Guides
Below you will find a multi-video series on setting up your Ehud v2, as well as our setup guide for our original Ehud v1.
**FAQ about the Ehud v2 sheath
We do our best to remove all the powder from the sheath caused by the manufacturing process. We apologize if we missed any, and you notice it on your blade. It will not harm the blade or trainer. You can use air or water to remove the rest, or it will work its way out on its own quickly.
There is a slight break in period of the sheath. It will feel very tight and a bit gritty when you first get it. We pre-load the flexures so that after the break in period, you have nice, consistent retention. About 20 insertions with the trainer will get everything smoothed out and the retention past its break in point.
Ehud v1 Setup Guide:

The Ehud: The Defense Lab’s Premier Fighting Blade
The Defense Lab’s Ehud Fighting Blade is in production and available for pre order!
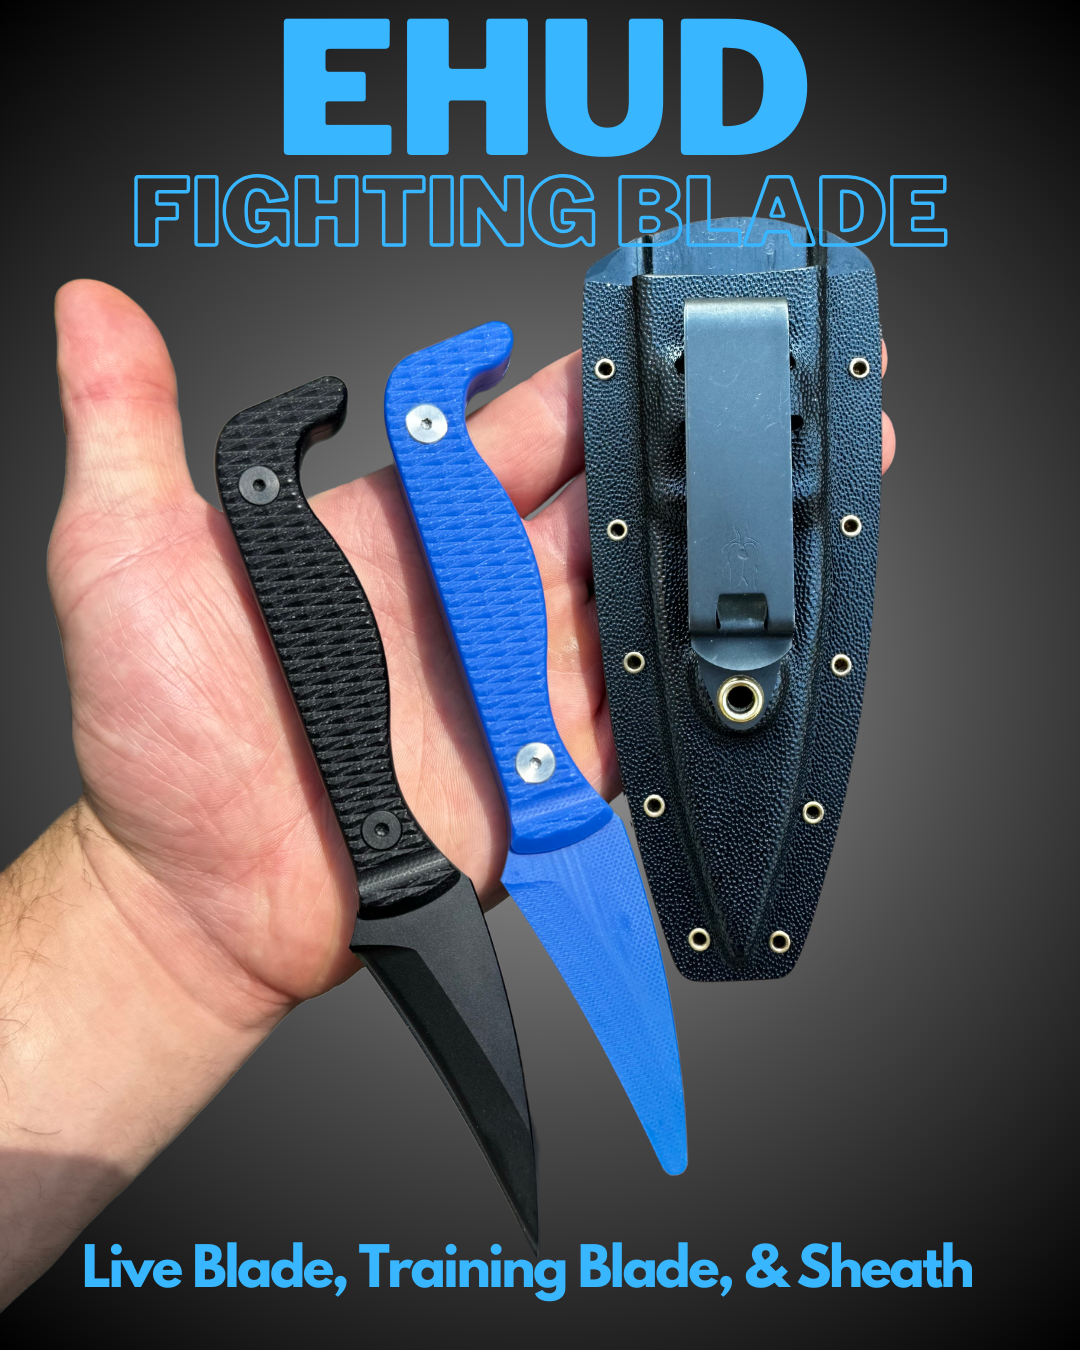


What You Get:

Live Blade: The 7” Ehud features a reverse edge 2.9” recurve blade designed for ripping - while maintaining the ability to pierce like a straight blade, due to its tip being in line with the center of the handle. The blade is made from Sandvik 14c28n with a corrosion-resistant black nitride coating. The end of the knife has a flagged pommel for easy extraction and retention, as well as a wave for quick orientation of the edge. The black G10 handle is machined with a diamond knurling pattern to ensure a solid grip even in wet conditions.
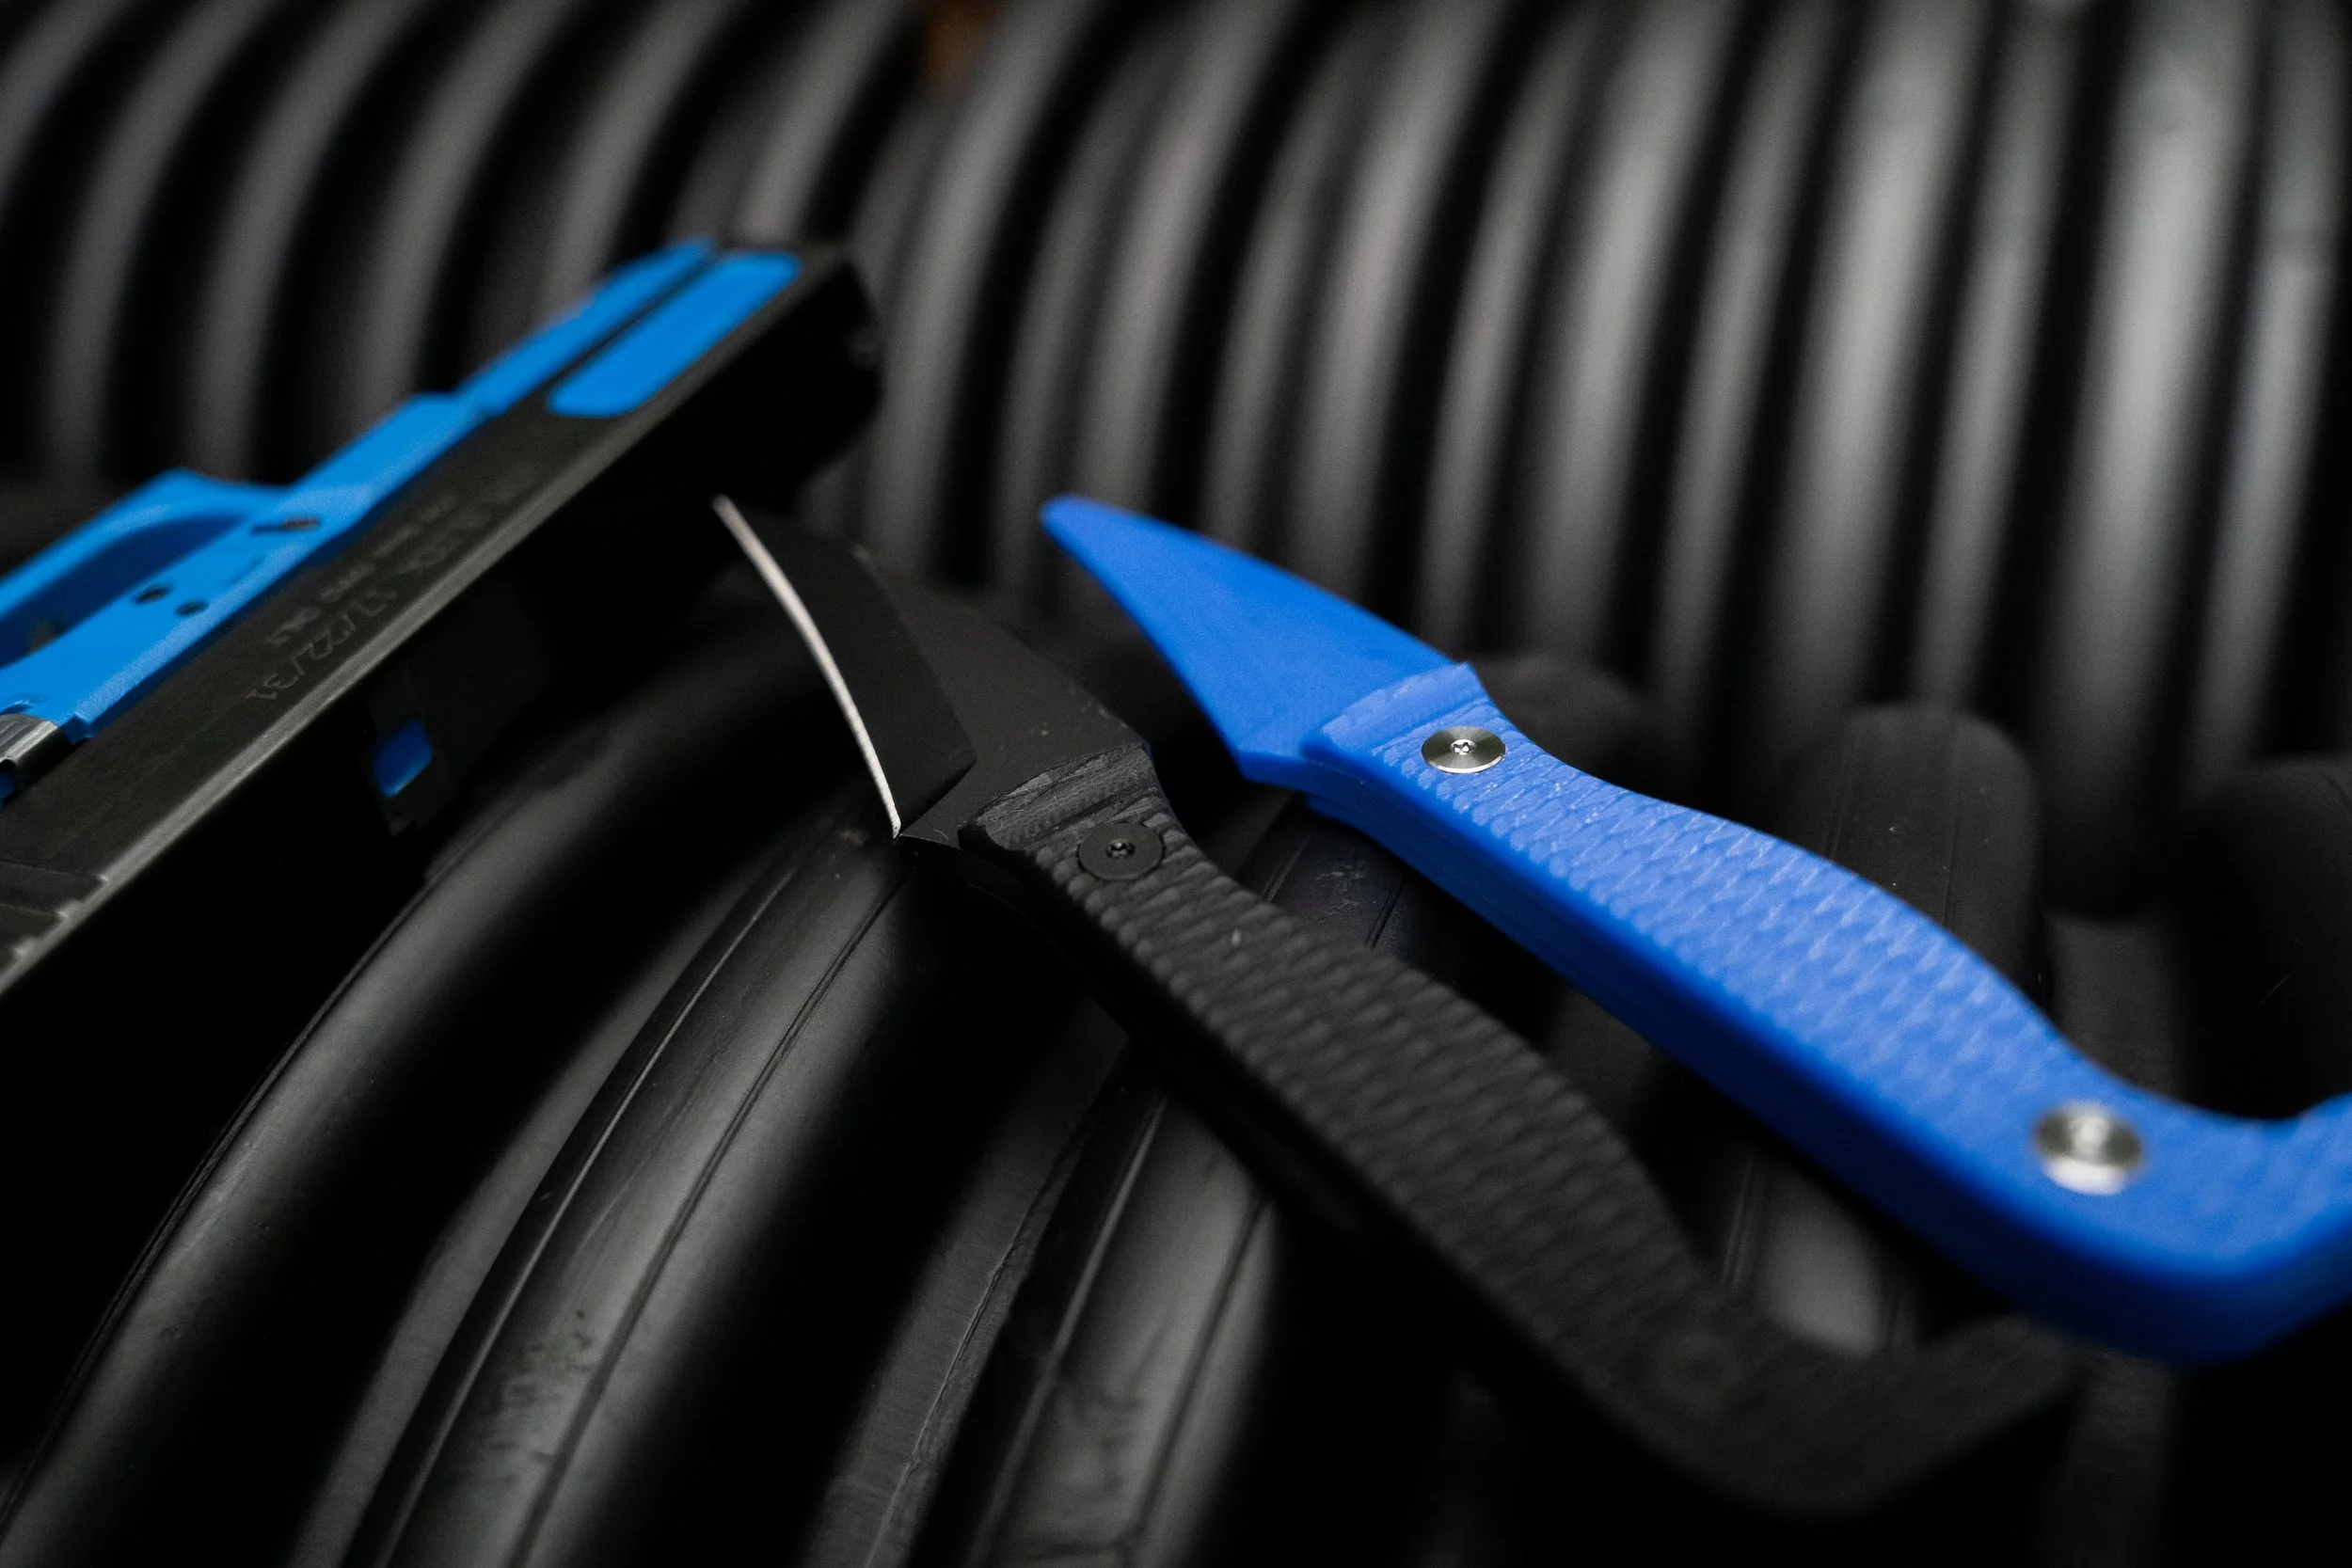
Training Blade: Designed to mirror the live blade in feel and dimensions, the safety blue training blade offers easy identification and rounded edges to ensure a safe and realistic training experience.
Sheath: The low profile, fully ambidextrous sheath fits both the live blade and trainer, carrying them at a mid-depth to maximize comfort and accessibility while concealed in your waistline. The Discreet Carry Concepts clip can be used with or without a belt and will hold tight to any pants, including jeans, sweatpants, yoga pants, gym shorts, or swim shorts, so you will never have to be without your blade.
“The design and execution of this blade is outstanding! I love mine and highly recommend to others for a EDC self defense fixed blade”
“I recieved my knife kit and was very impressed with the thought you put into it. It is perfect in size and weight and carries like a dream. I love it. With so much disappointing gear out there, I just wanted to take a second to acknowledge a quality piece. ”
“Couldn’t be more satisfied with the purchase. Also came with a great instructional video!”
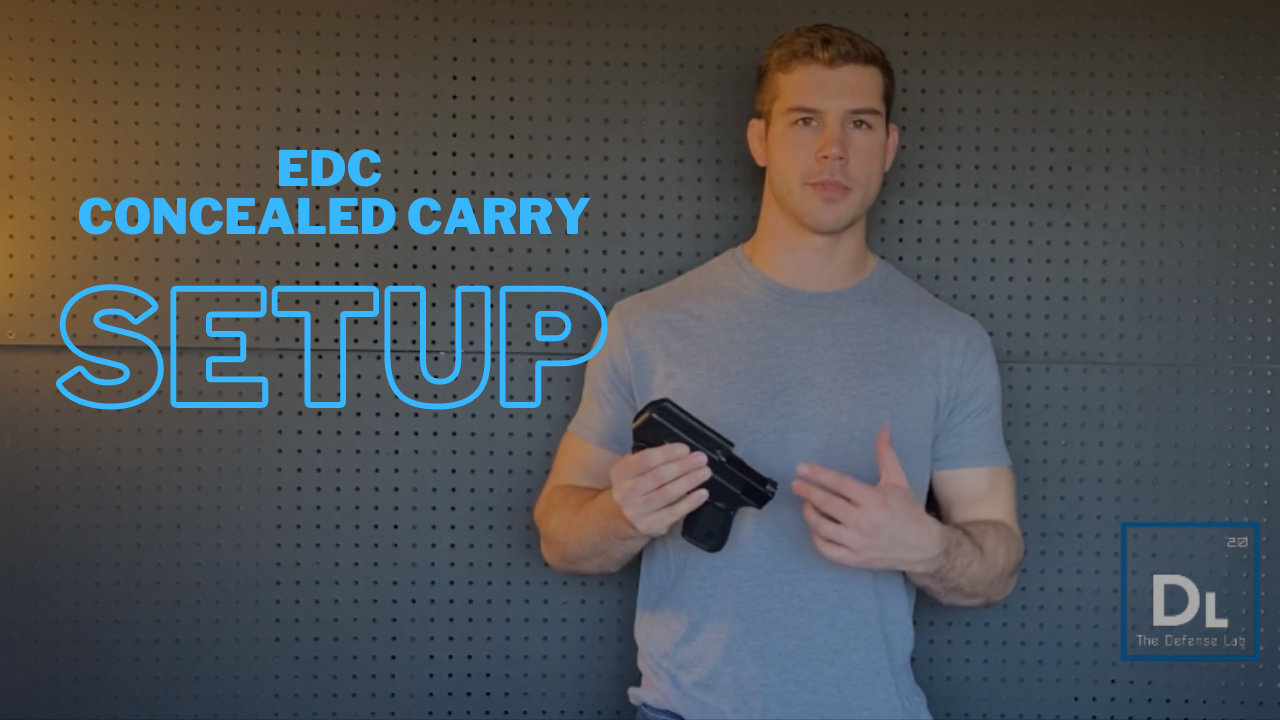
My Concealed Carry Setup
Gun - Glock 19 Gen 5
Starting with the gun, I carry a stock Gen 5 Glock 19. The Glock 19 is a reliable, compact striker fired 9mm handgun. The Glock 19 is small enough that it is easy to conceal, while being large enough that it is easy to shoot and can carry 15 rounds of ammo.
There are becoming more and more reliable “subcompact” guns that are smaller than the Glock 19 but can still hold between 10 and 12 rounds. While I may transition to one of those in the future, right now I am sticking with the 19 as I have shot thousands of rounds through this gun and am very comfortable with it.
Ammo - 9mm Federal HST 124 Grain +P
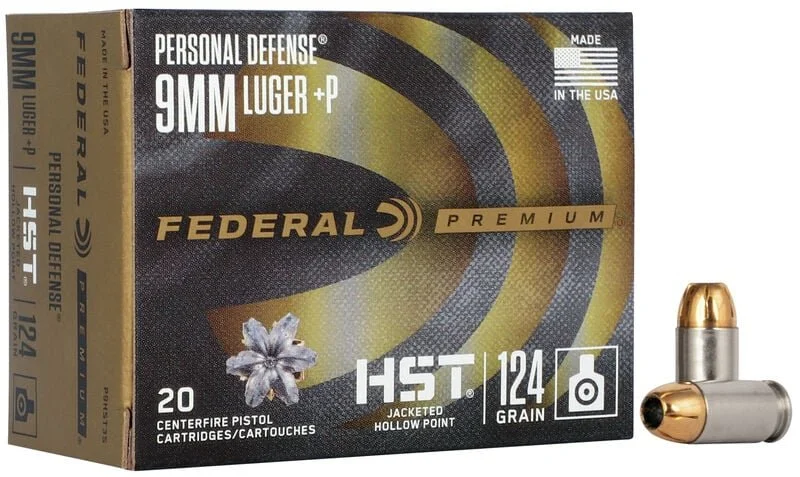
Inside the gun I carry Federal HST hollow point ammo. This is a reliable, well tested, and top performing defensive ammo which is why I choose to carry it.
Holster - Phlster Skeleton

My gun rides in a Phlster Skeleton holster. The Phlster Skeleton is a great quality holster at a fair price. The biggest reason I choose this holster is the retention. The gun clicks in and holds tight, I can even hold the holster upside-down with a Glock 19 and loaded magazine inside without the gun budging. This gives me confidence that even in a standing or grounded fight, the gun will stay retained in the holster and won’t end up flying out when I don’t want it to. Unlike many cheaper holsters that rely on squeezing the entire gun for retention, the Skeleton holster gets retention off of the trigger guard. This makes for more solid retention on the gun, but once you pull past the retention point the gun comes out fast and easy.
Clip - Discrete Carry Concepts Mod 4 1.5” Standard
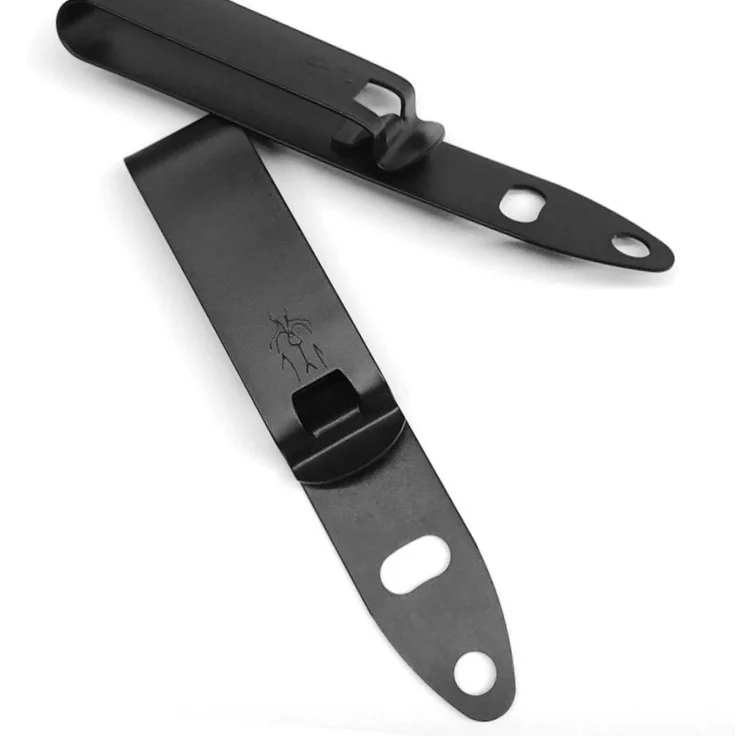
I replace the plastic clips on all of my gear with Discrete Carry Concepts Clips. I have seen on multiple occasions plastic clips release from the belt during the draw leaving the defender with a holstered gun in their hand when they need it most. I have also seen the plastic clips break in combatives training. I have been using the Discrete Carry Concepts clips for years now and have never seen or heard of one fail.
For the Skeleton Holster I found that the Mod 4 1.5” Standard length clip offers the perfect ride height. I first put on the Mod 4 1.5” Shorty which ended up being too short, causing the gun to ride too high making it difficult to conceal.
On the Discrete Carry Concepts website they lay out all of their clips on an inch grid so you can get a better idea of hole spacing and clip length to find what will work best for you.
Belt - Blue Alpha Low Profile EDC Belt
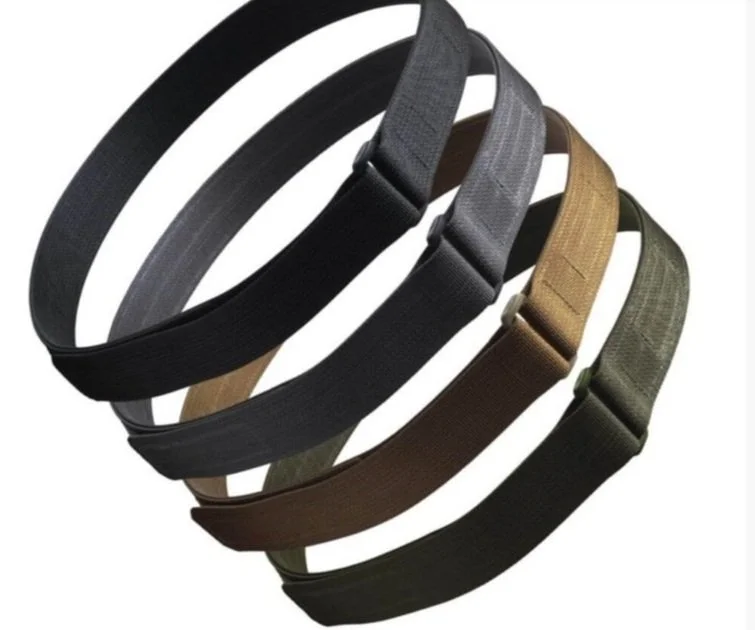
Lastly, this is all carried on a Blue Alpha Low Profile EDC Belt. This is a simple, no frills belt that gets the job done. This belt is sturdy enough to hold the weight of your gun and any other equipment you may carry, but not so stiff that it prints a ring around your waist through your shirt, or bothers your hips after wearing it all day. The low profile buckle lays flat so that it doesn’t cause any unneccesary printing.

Carrying a Fixed Blade Horizontal - 2 Options
Carrying a Fixed Blade Horizontally
Why carry a fixed blade horizonal rather than vertical?

Carrying a fixed blade horizontally rather than vertically offers many advantages. For some, they find it much more comfortable, as it doesn’t dig into them when they sit down or bend over. Another advantage is that you can draw the blade with either hand into a point up or point down variation (as seen in the picture to the left) — something that can’t be done nearly as easy with a vertically carried blade. A third advantage is that the draw requires much less room and hand movement than drawing a blade from a vertical position, you can simply reach up under your shirt and draw the blade out.
While there are many advantages to carrying a blade this way, there is also some downsides. One being that not every blade can be carried in this orientation - it has a lot to do with the size and shape of the blade as well as the sheath set up.
Option #1 - Using a pull-the-dot soft loop
A very easy and secure way to carry a fixed blade horizontally on the belt line is to run a pull-the-dot soft loop around the sheath and through the eyelet. You can find soft loops with the needed hardware included here.
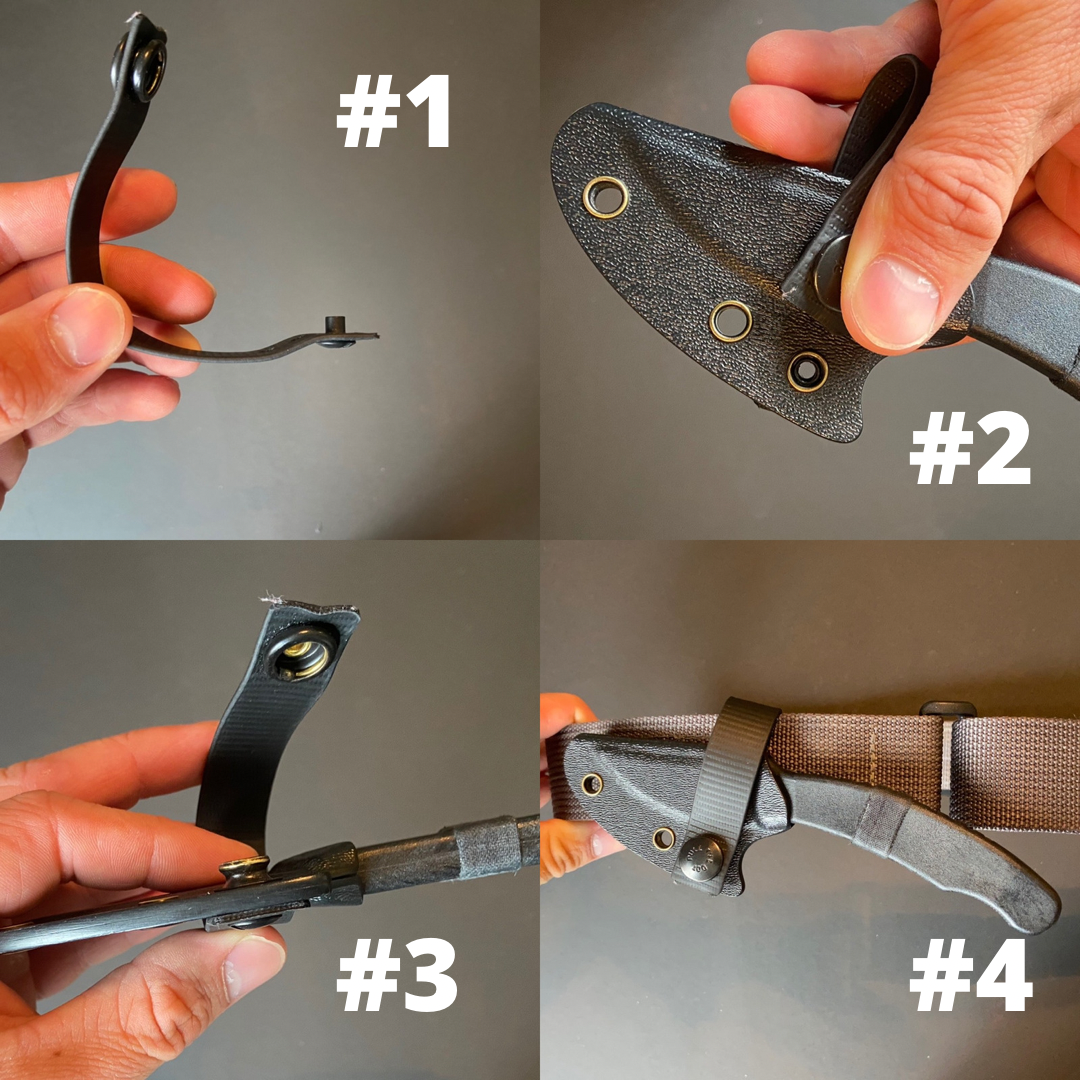
Steps
Put the slotted post through the hole in the back of the soft loop.
Add your sheath on top of this assembly.
Put the snap stud on the front side of the sheath and secure it to the slotted post with the provided screw.
Run the soft loop behind and over top of your belt and snap it to the front of the sheath.
Option #2 - Utilizing the “pocket hook”
This first option requires the sheath of the knife to have a “pocket hook”. The pocket hooks original function is to be carried in the pants pocket. When you go to draw the blade, the hook catches on the top edge of your pocket and releases the blade, leaving the sheath in your pocket and blade in your hand.

We can also use the pocket hook to carry the fixed blade horizontally by running the sheath behind your belt loop. Allow the pocket hook to catch on the belt loop and the blade to hang towards your center line. The pocket hook will keep the sheath from coming through the belt loop when you go to draw the blade. You can run this setup with or without a belt, although running the knife behind the belt (still hooked onto the belt loop) offers better retention.
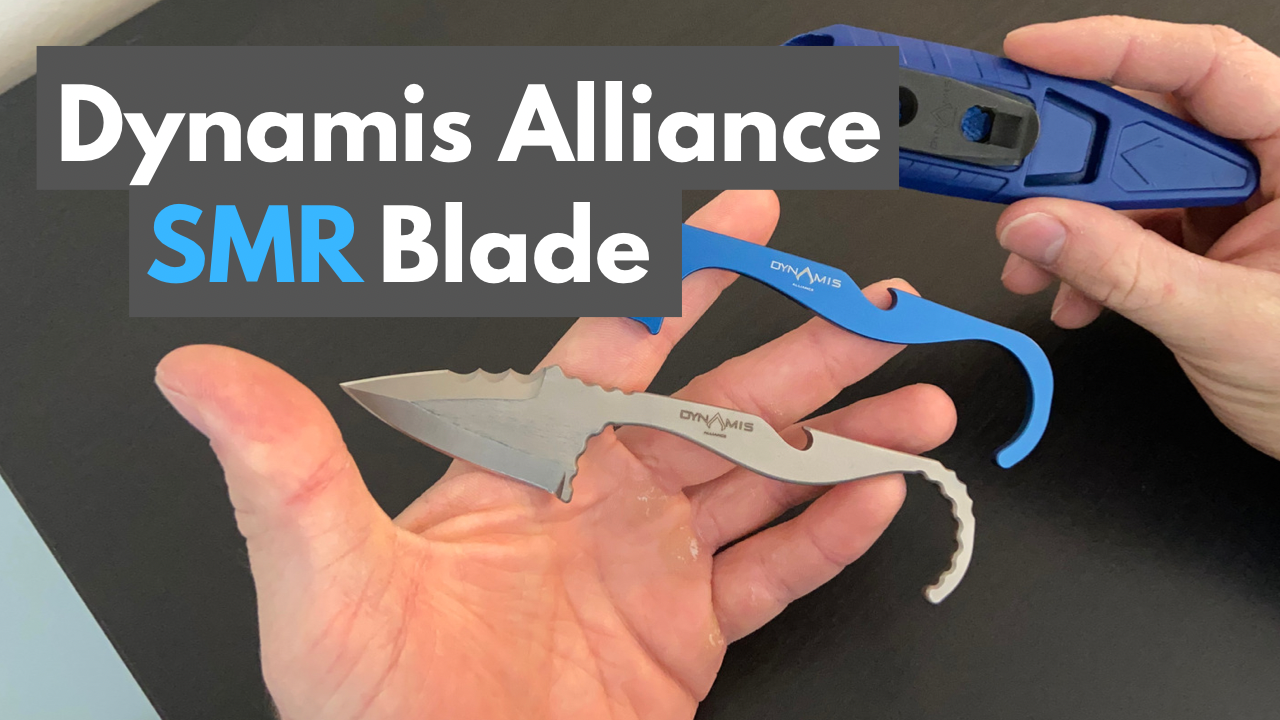
Dynamis Alliance SMR Blade Review and Carry Options
Getting Started
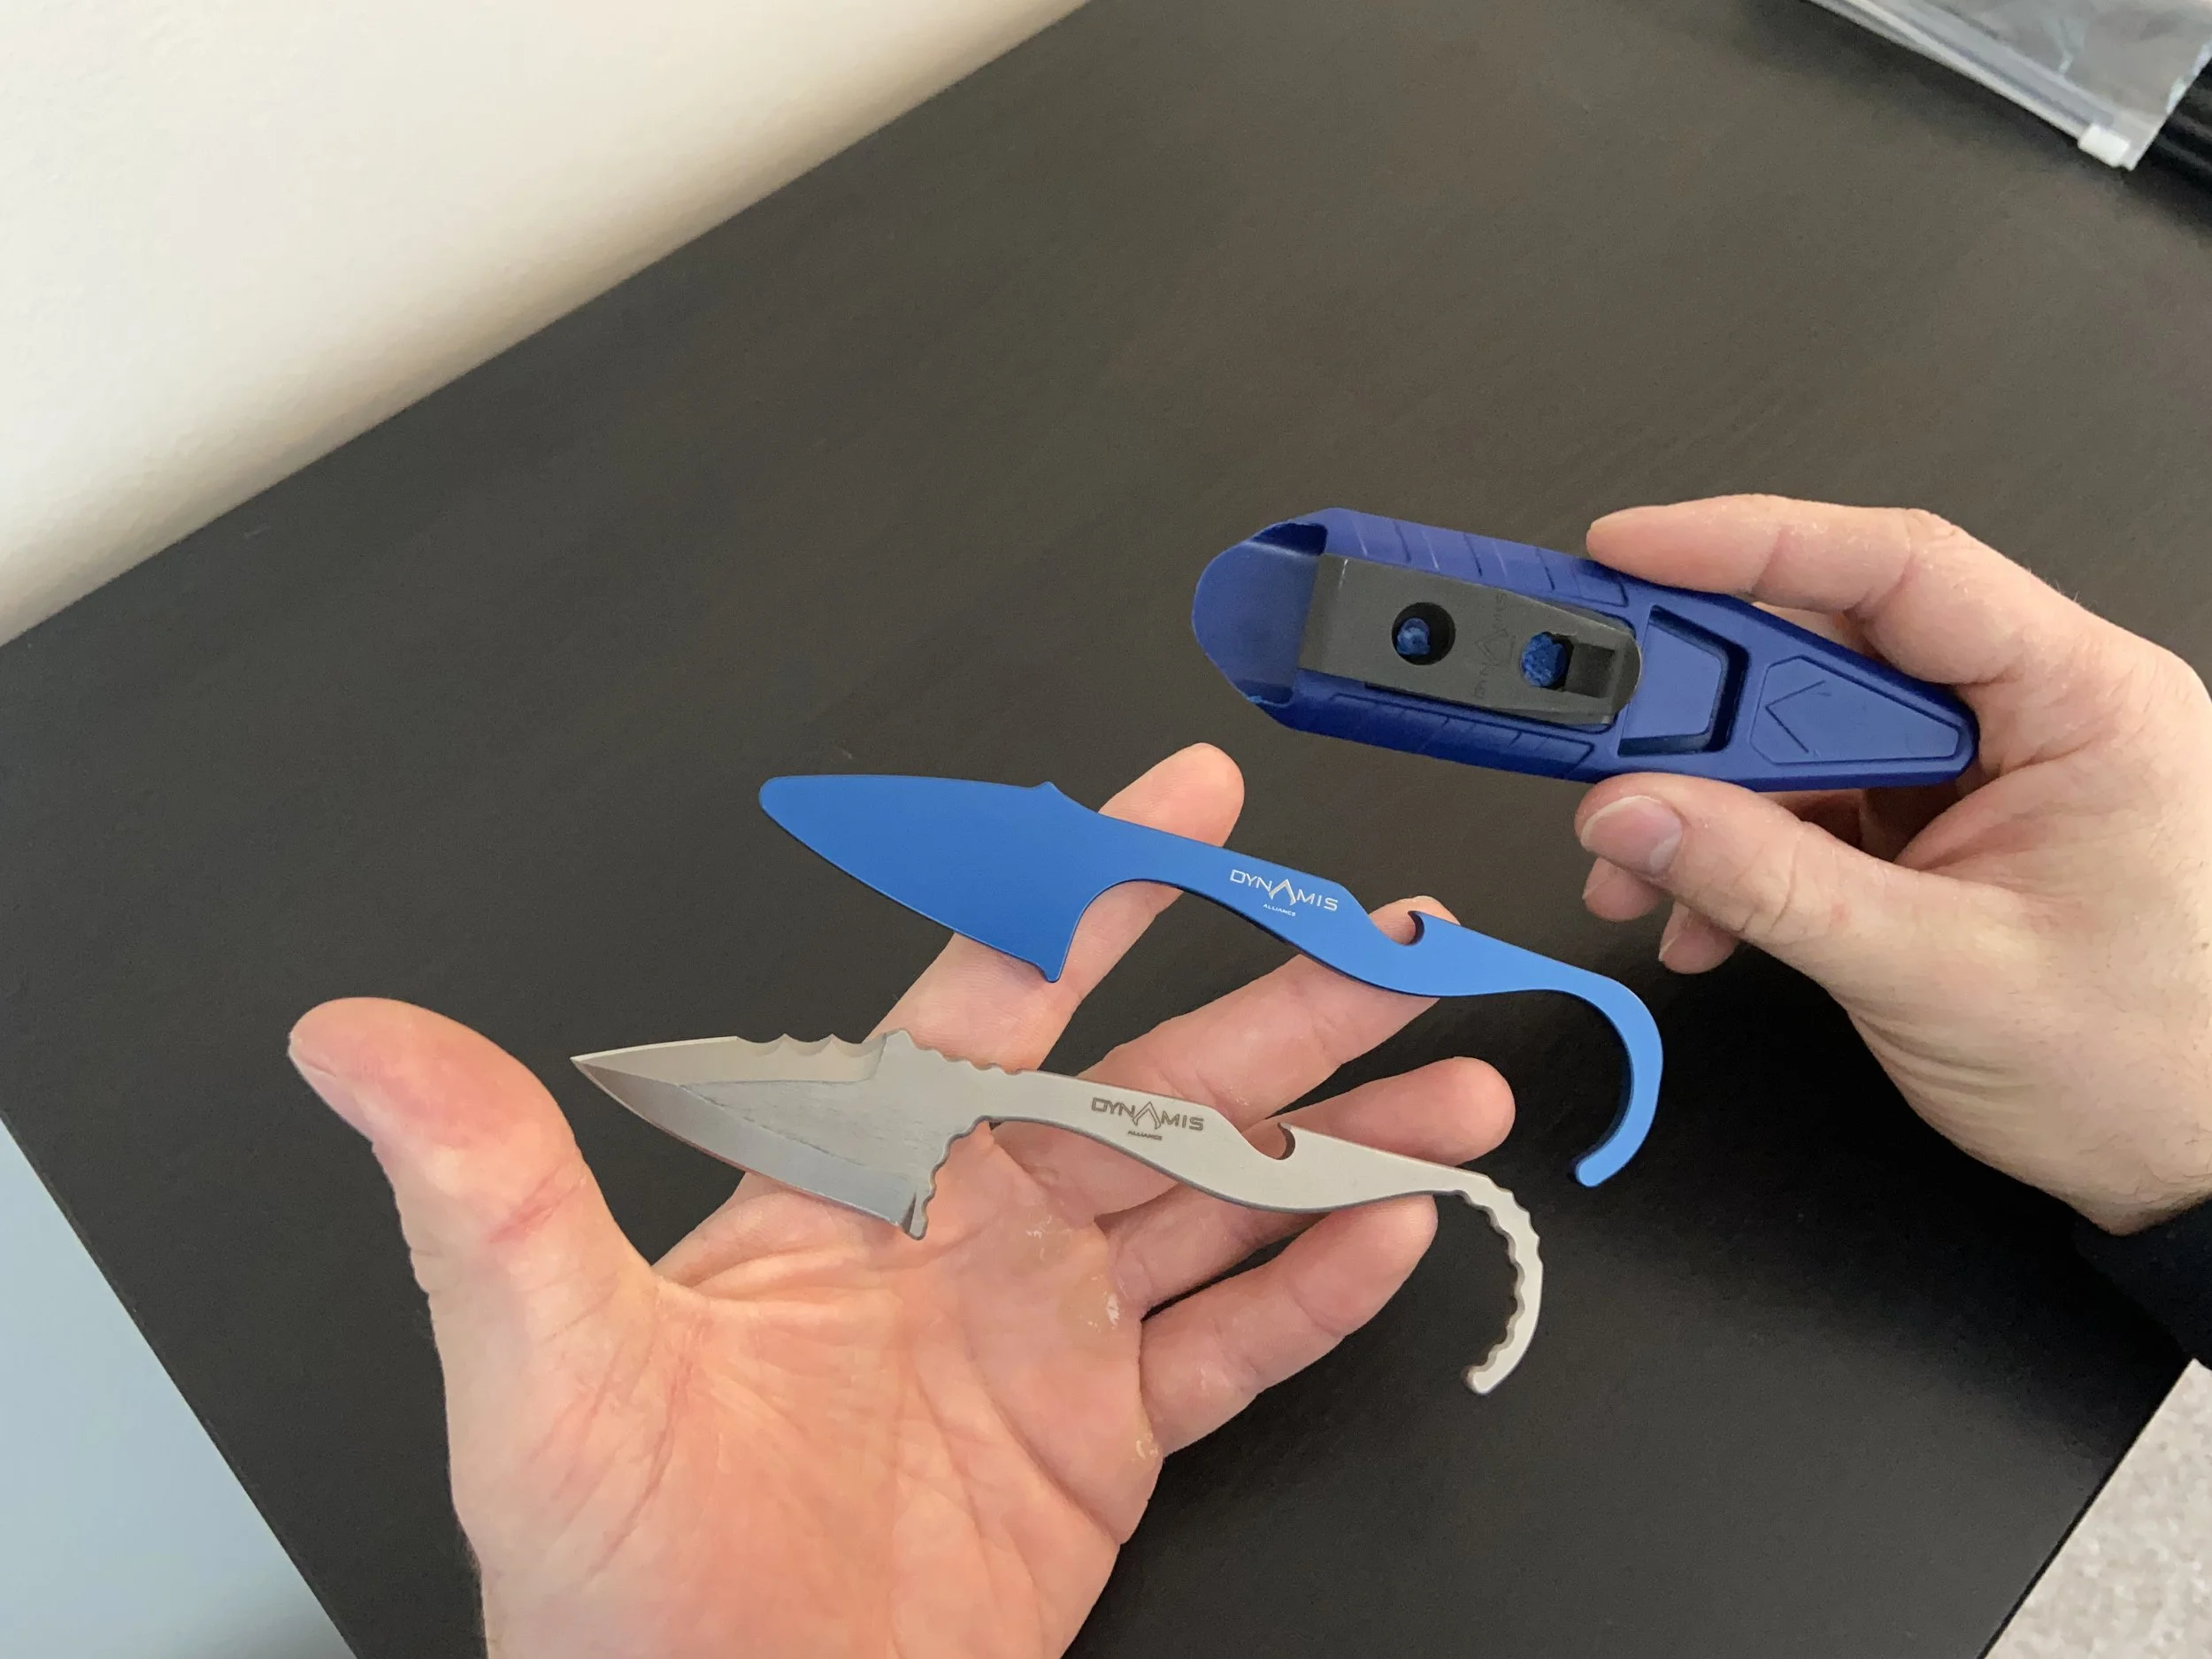
The Dynamis Alliance SMR Blade is a small, easily concealable fixed blade geared towards self defense. In the box we get the live blade, a matching trainer, and the sheath. The Blade is double edged with the front side being a straight edge and a serrated edge on the reverse side. The knife is made out of CPMS110V corrosion resistant steel and measures 5.75” in total length with a 2” cutting edge.
What I like
The Blade
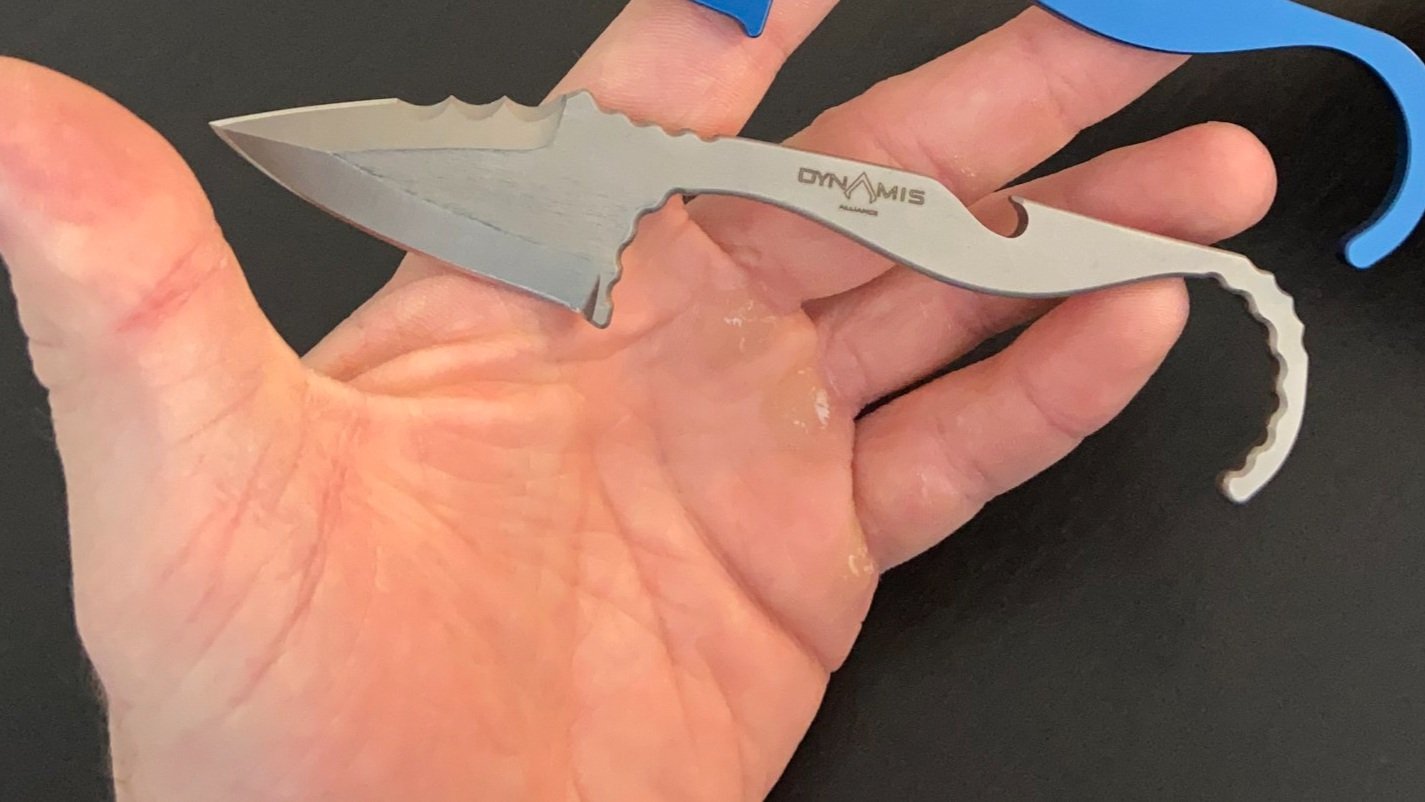

Example of a sharpening choil
The length of the handle is really nice, it is big enough to get a full grip on, while still being easy to conceal whether inside or outside the sheath.
The double edged blade means that it can be used in a regular grip or a reverse grip (edge facing your body) in both a point up or a point down orientation - Point down/edge in being what I prefer.
The blade does not have a sharpening choil (divot that separates the cutting edge from the handle), I like this because the sharpening choil tends to be a snag point when trying to stab through clothing.
The hook on the handle allows you to quickly draw it from the sheath, while still allowing it to sit very low in the sheath for easy concealment. I like this much better than something like a ring handled knife, which has many downsides from safety concerns, to not being able to easily switch hands with the knife. I also believe that a ring actually makes the knife harder to draw quickly because you have to be much more accurate getting your finger into the ring to draw, whereas with the hook, you can just close your hand around the handle, and when you begin to pull the knife from the sheath, that hook will catch the top of your hand.
The Trainer
I like that the knife comes with a trainer. I believe that any tool you are planning on using for self defense should have a matching trainer. The trainer is an exact replica of the blade minus any sharp edges or jimping.
You do have to be careful with metal trainers like this one when practicing with another real person. Metal trainers can cause serious injury if used incorrectly. This trainer is mainly good for practicing your draw, using on a dummy, or light sparing with a partner. Something like a foam trainer should be used to live - full force training on another person.
The Sheath
The sheath is injection molded and ambidextrous for use by both right and left handed carriers. I like that the sheath holds both the live and the trainer blade meaning you can get a few reps in before you leave the house, pop the trainer out, put the live blade in, and go about your day.
I like how deep the knife sits in the sheath. This make is extremely concealable.
The sheath ZERO clip is very similar to the Discrete Carry Concepts Clips which are a standard on all of my self defense equipment. The metal clip has a tooth which snags strongly onto clothing, meaning you do not need to clip it over a belt and can still draw the knife without the sheath going anywhere.
I like the zero clip especially for when I’m working out. This allows me to easily clip the knife to my sweatpants or gym shorts.
I also like this feature when I need to dress up in dress pants with a tucked in shirt. The clip is “tuckable” meaning you can run the clip over your pants and behind your belt, then tuck your shirt in behind the clip. This makes for an extremely discrete carry setup.


Things I would change
The Serrated Blade - I do not like serrations on a defensive or fighting knife. Serrations are notorious for getting snagged in clothing. This means you may get one good stab and then your knife is stuck and unusable. Serrations also make it so you cannot “stab and rip”. This technique allows you to increase the damage and effectiveness of your stab when using the knife for self defense purposes. I wish they would have either just made both edges a straight blade, or went with a single, straight edge on the reverse side (facing your body).
The hook “curling over” - I do like the hook on the handle and think that it helps with your draw. I do wish though that is didn’t start behind around into more or a ring shape. This makes it hard to just wrap your hand around the knife and pull. I demonstrate this more in the video above.
Carry Positions

Waist line (vertical)
Carrying in the waist line in a vertical orientation make the knife easy to conceal and draw into a point down grip.
Clipped to front pocket
Carrying the knife clipped to your front pocket may be slightly more comfortable for some people. This carry position allows you to easily draw the blade while remaining somewhat concealed. In this position people will be able to see the clip on your pocket more easily than if it were vertical in your waistline, but it isn’t extremely obvious, especially with the dark color of the clip.
Waist line (horizontal)
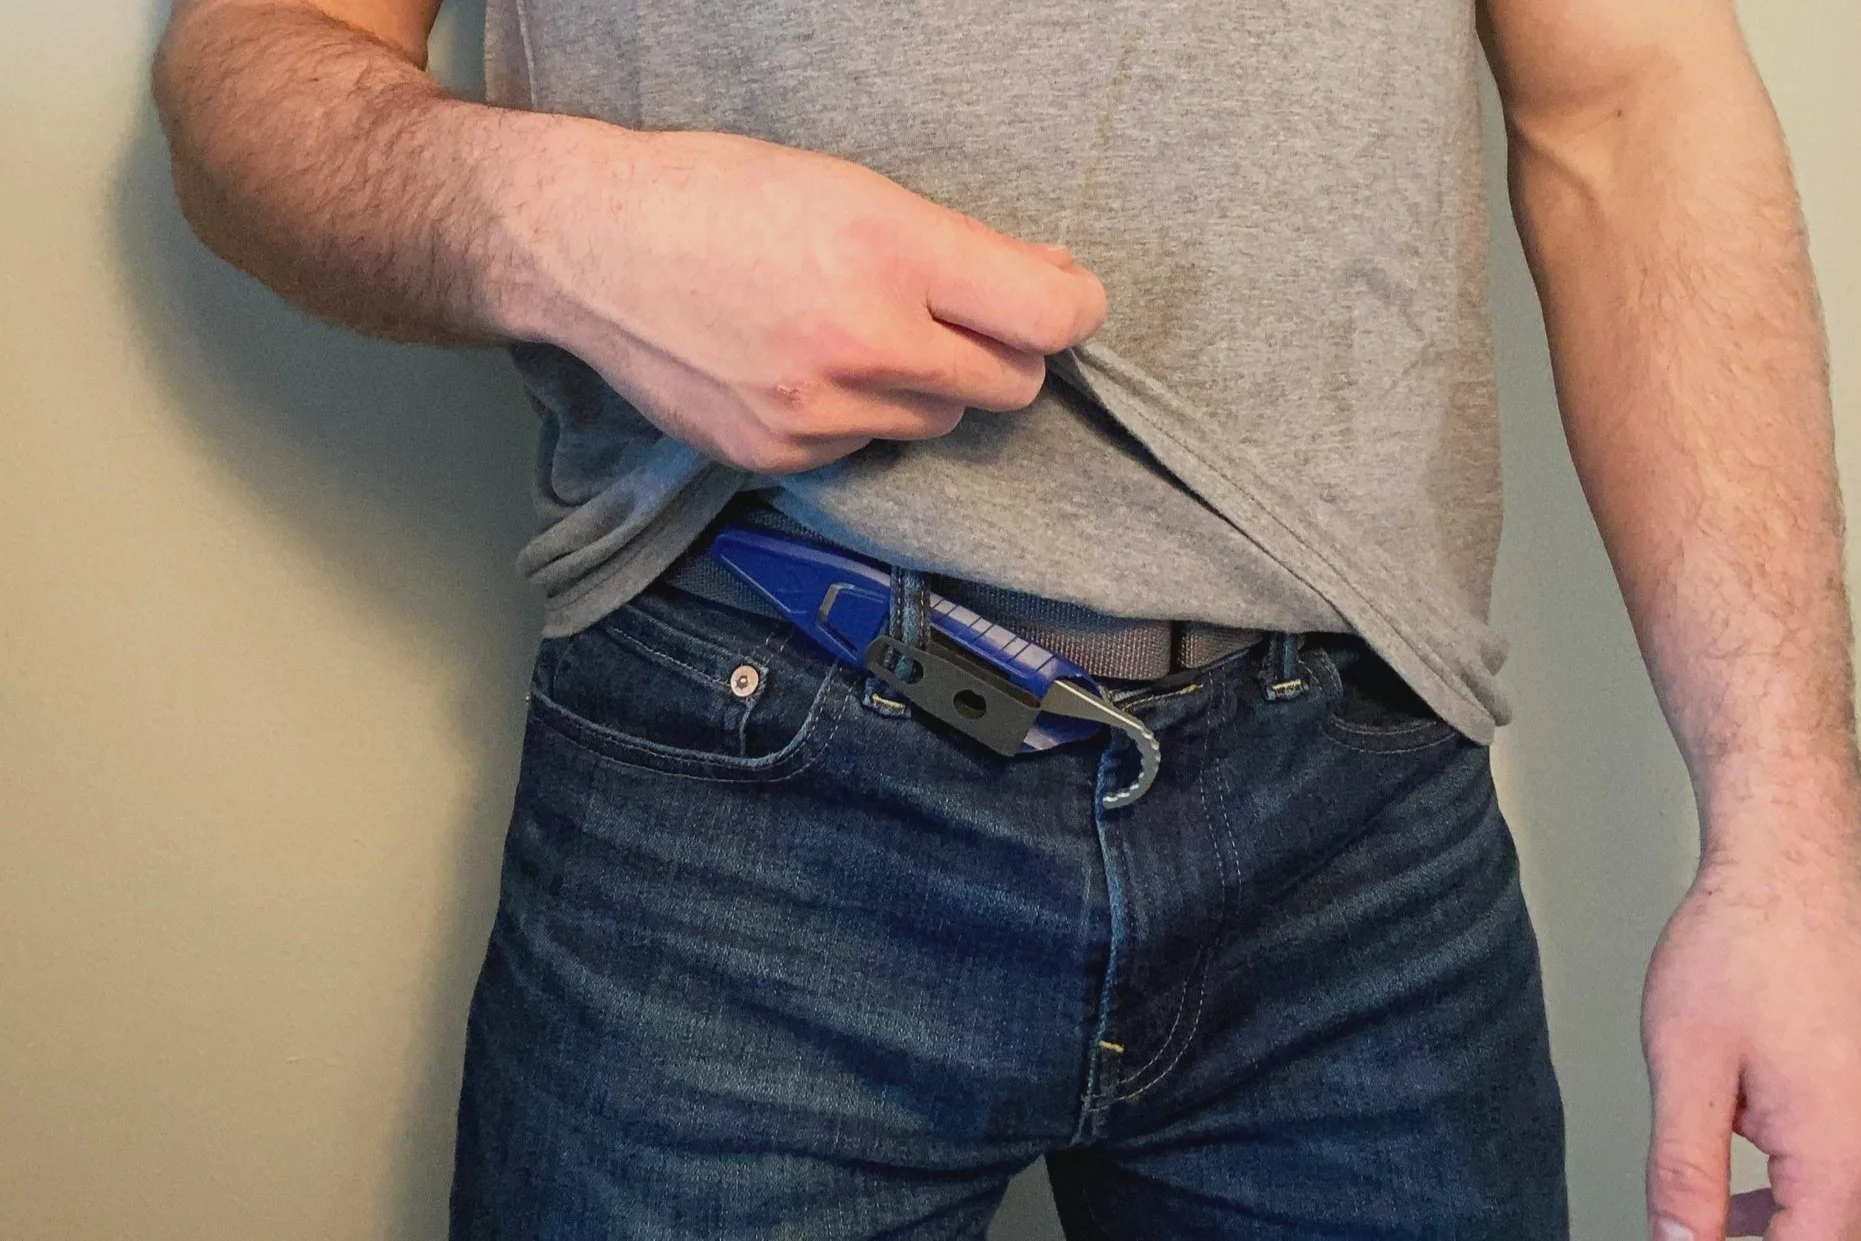
This more unconventional carry position is one of my favorites. With the blade riding horizontal, it is hardly noticeable to the wearer even when bending over. The short overall length on the knife allows it to still be easily concealable and you do not get much printing. Why I like this position so much is the ease of the draw and how discretely I can pull it. I do not need to clear my shirt out of the way and need very minimal arm movement. This means I can get the knife out very quickly and discretely by reaching up under my shirt, grabbing the hook, and pulling down, resulting in a point down grip. This position also allows me to draw the knife in scenarios that I wouldn’t be able to if it was carried vertically, such as my arms are being held down.
Conclusion
Overall, this knife wouldn’t be my first option, but I do like it. My favorite part of the knife is the small size, ease of concealability, and multiple carry options. The serrations on the blade are really the deal-breaker for me. By testing knives and training on an organic medium covered in clothing, you will quickly see the downsides of serrations on a blade.
If you like this content and would like to see more, please check us out on our social media pages linked below. If you are interested in training, take a look at our training page or reach out!

What is a Sim Gun? Simuntion? Ultimate Training Munitions?
What is a Sim Gun? Ultimate Training Munitions, Simunition, Force on Force?
What is a sim gun? Simunition? Ultimate Training Munitions?
There isn’t a ton of information on the internet about “sim guns”, so I will take a minute to explain. I’ll use the umbrella term “sim gun” to describe the type of firearm conversions most commonly manufactured by Simunition and Ultimate Training Munitions (UTM).
We use these guns in our training, specifically in our More Than Just A Gun Seminar, and believe that they are an extremely valuable asset.
What are they?
A sim gun is a real firearm that’s been converted to be safely used as a training tool, while maintaining all the same characteristics as your real handgun. They are usually used to fire a non-lethal marking projectile.
UTM, or ultimate training munitions, are the conversions we use at The Defense Lab. They come as a full slide with a barrel and recoil spring, which replaces the real slide, and drops right onto the original frame of the handgun. For example, ours use a Glock 17 frame.
There have been safety features implemented to make it impossible to chamber and fire a live 9mm round through the conversion.
What makes them so realistic?
Since you’re using the frame from your real firearm, it retains all the same features and manipulations as your real gun does. From the way you load the magazine to the feel of the trigger, it even fits right into your carry holster.
This also means that anything that would make your real firearm malfunction will also cause this to malfunction, and clearing the malfunctions look the same on the sim guns as they do a real firearm. This is a very important feature for training close-range gun fighting and combatives.
For example, if someone is on top of you and has ahold of the slide of the gun and you pull the trigger, the round in the chamber will go off, but then the slide won't be able to reciprocate - meaning the spent casing will fail to eject out of the chamber, and the gun will be inoperable until that malfunction is cleared.
This makes for extremely realistic training for those who carry a firearm.
The Ammo

The round that we shoot out of these guns is what UTM calls their Man Marker Round. It’s a non-lethal marking projectile that fires at about 330 fps and leaves a small waxy compound on your skin or clothing so you can see where you were hit. This round produces a small pain penalty when hit, which increases stress and adrenaline to those participating in the scenario.
Ultimate Training Munitions makes a few variations of ammo to use in their conversions including the Man Marker Round, Non-Marking Round, Silent Blank Round (cycles the gun with no projectile or noise), and Battlefield Blank round (loud noise, no projectile). The Man-Marking Round is what makes these conversions unique to other firearm training tools, and is what you see most commonly used in training.
Conclusion
Overall, I think that the sim gun, or the UTM gun, is an invaluable training tool if you carry a firearm. It allows you to take scenario-based training to the next level, whether working at a distance or working in extremely close quarters. The sim gun bridges that gap between live fire at a target on the range, and empty-handed training with a partner on a mat.
If you found this information helpful check us out on social media for more content like this, our accounts are linked below. If you’re interested in training, please take a look at our training page!